Kid-Friendly Halloween Snacks as seen on Chicago Windy City Live
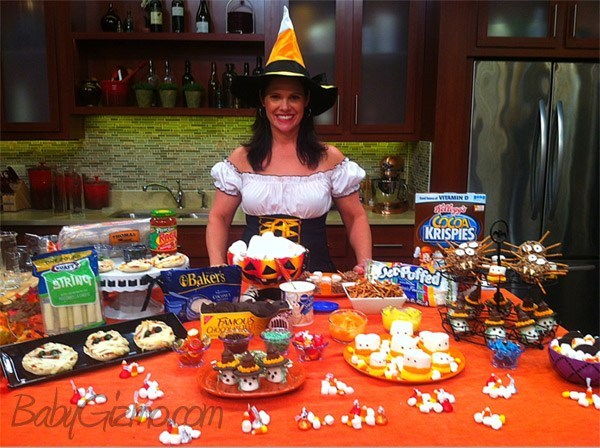
Halloween snacks can be fun, spooky and an easy-to-do project with the kids. Your little ghosts and goblins will love helping in the kitchen to whip up some of these ghoulish treats. Today I did a segment for Chicago’s popular morning show – Windy City Live – and shared 4 fun and easy Halloween snack ideas. Here is the segment (and the recipes are below!):
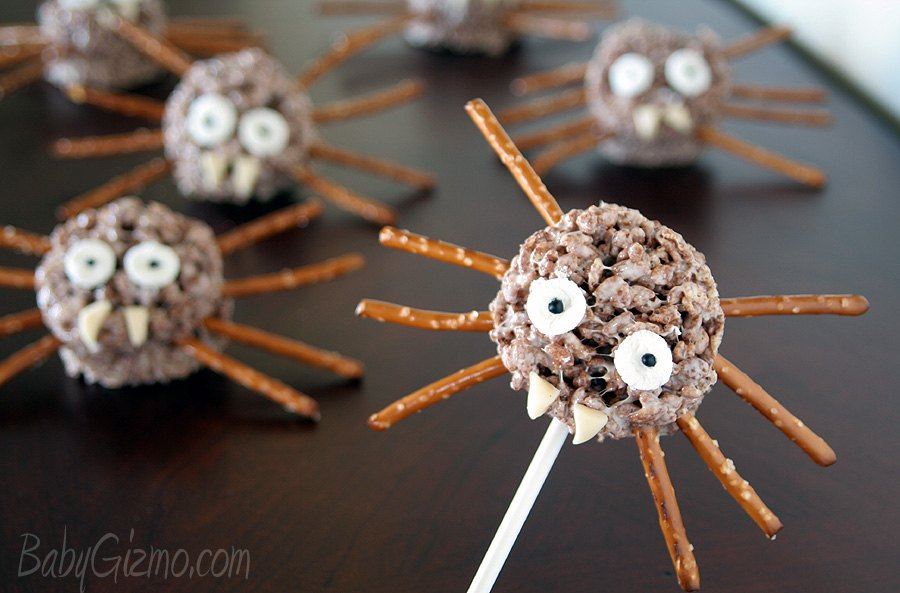
Cocoa Krispies Spider Treats
Ingredients
6 cups Kelloggs Cocoa Krispies
1 (10.5 oz) bag of mini marshmallows
1/4 cup butter
Decoration on the Spiders:
Pretzel Sticks
24 Mini Marshmallows
Black Food Gel Icing
Vanilla Tootsie Rolls
Cocoa Krispie Treat Instructions:
- Spray a 9×9 pan lightly with cooking spray
- Melt butter over low heat in large saucepan
- Remove 24 mini marshmallows from the bag and set aside for decoration.
- When butter is melted add in rest of the marshmallow bag and stir until melted.
- Remove from heat and stir in your Cocoa Krispies.
- Press into prepared pan. Let cool for 15 minutes.
Spider Treat Assembly
- Use a 2″ round cookie cutter to cut the krispie treats into circles.
- Using a rolling pin, flatten 24 mini marshmallows for the eyes.
- Press the marshmallow eyes on the krispie rounds.
- Flatten Vanilla Tootsie Rolls and cut out triangle shaped fangs and press onto krispie rounds.
- Take 8 pretzel sticks and gently stick into the sides of the rounds to make the legs. Take 8 pretzel sticks and gently stick into the sides of the rounds to make the legs. *HINT: To make it easier without breaking the pretzel sticks, poke a hole where each leg should be with the cake pop sticks first, and then insert the pretzel sticks.
- With the black food gel icing, make a dot on each marshmallow eye to complete the eyes. Makes 12 spiders.
*Recipe adapted from Cookies and Cups.
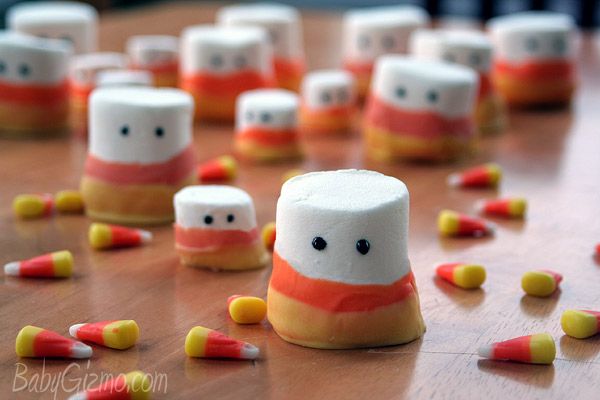
Candy Corn Ghosts
Ingredients:
1 bag of marshmallows (large or giant)
8 ounces of white chocolate
Yellow food coloring
Orange food coloring
Black gel icing tube
Instructions:
- In the microwave or in a double boiler, carefully melt the chocolate.
- Once melted, divide the chocolate evenly into two bowls. Add enough yellow food coloring to one bowl until the desired yellow shade is achieved. Then add orange food coloring to the other bowl to get the desired shade of orange. *Hint: To make it easier to dip the marshmallows, I thin out the chocolate by mixing in about 1 tsp of vegetable oil.
- Dip a marshmallow in the orange first about 1/3 of the way up and then set on a piece parchment paper. Repeat with the rest of the marshmallows until you use up all the orange chocolate.
- Put the marshmallows in the refrigerator for 10 minutes to set the chocolate.
- Remove from fridge and repeat, only half-way up the orange, with the yellow chocolate. Set on parchment or wax paper.
- Finish by dotting two circles with the gel tube to form the eyes. Let the chocolate set and then enjoy!
This is a great snack/treat to make the day before and keep in the freezer. I made them this past weekend for a neighborhood party and it only took about 30 minutes out of the freezer for the marshmallows to thaw and they were very fresh when we arrived at the party.
*This post and this post inspired me this year to share this recipe and take some fun photos too!
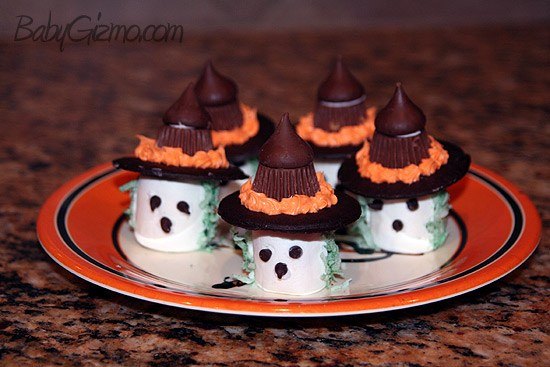
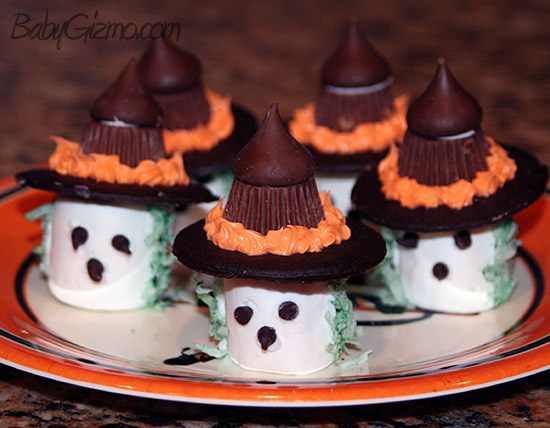
Marshmallow Witches
Ingredients:
1/2 cup vanilla frosting, divided
36 miniature semisweet chocolate chips
12 large marshmallows
1 drop each green, red and yellow food coloring, optional
1/4 cup flaked coconut
12 chocolate wafers
12 miniature peanut butter cups
12 milk chocolate kisses
Instructions:
- Witch Face: Dab a bit of frosting on the bottom of three chocolate chips. Press two for eyes and one for nose onto each marshmallow.
- Witch Hair: Combine green food coloring and a drop of water in a small re-sealable plastic bag. Add coconut and shake well. Spread a small amount of frosting on sides of marshmallows. Press coconut hair into frosting. Place 3 tablespoons of frosting in a small heavy-duty re-sealable plastic bag; tint orange with red and yellow food coloring. Set aside.
- Witch Hat: Spread some of the remaining frosting in the center of chocolate wafers; press peanut butter cups upside down into frosting. Lightly spread bottoms of chocolate kisses with frosting; place on peanut butter cups. Cut a small hole in the corner of pastry or plastic bag; insert a small star tip. Fill the bag with frosting and pipe stars around the base of each peanut butter cup. Secure a hat to each witch with a dab of frosting. Yield: 1 dozen.
*Recipe originally published in Quick Cooking September/October 2005, p16.
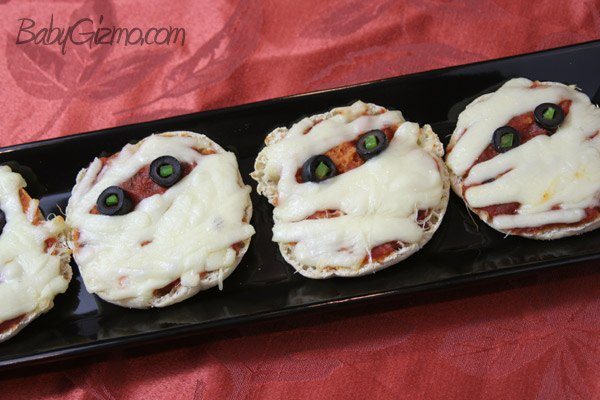
Pizza Mummies
Ingredients:
English muffins
Pizza sauce
Black olives
Green pepper
Pull-apart Kraft Mozzarella Cheese sticks
Instructions:
Preheat the oven to 350º F. Lightly toast English muffins. Spread a tablespoon of pizza sauce onto half of each muffin.
Place your olive slices at eye level on the mummy muffin and add round bits of green pepper for pupils.
Pull apart cheese sticks and lay strips of cheese different ways across the muffin for the mummy’s wrappings. Use one cheese stick per muffin.
Bake at 350º F. for about 10 minutes or until the cheese is melted and the top of the muffin is lightly toasted.

