Girl Scout Tagalong Cookie Recipe
Earlier in the week, I shared a delicious Thin Mint cookie recipe. While Thin Mints are awesome and ONE of my favorites, my other favorite Girl Scout cookie is the Tagalong. You know, the crunchy shortbread cookie with peanut butter filling and covered in chocolate. Yum. The problem with the Tagalongs besides the fact that you can only buy them once a year and if you miss the Girl Scout order forms you are out of luck…is that there are like three cookies in a box. Okay, maybe not three but if I can remember from last year, it is like 12. Twelve cookies?!? They aren’t even big cookies and the box puts me back $4.50. You open the box and there is more plastic cookie holder than actual cookies. Booooo…I need more cookies than that! Yes, they are good and all but if I’m spending $4.50, I’d rather get the box of Thin Mints with two stacks of cookies!
Here’s the thing though – I like the Tagalongs! I want Tagalongs and not only Thin Mints and I want them other times of the year and not just Girl Scout season! Good thing there are crafty, baking mamas out there who can figure it out. Yes, you can make your own Tagalong cookies and they are to die for. Seriously, I think they are even better than the Girl Scout version. I made them earlier this week and the cookies were gobbled up. In my defense, the cookies weren’t just eaten by me. Family and neighbors took care of them for me. I did have my fair share though. 🙂
Cookies
1 cup butter, soften
1/2 cup sugar
2 cups all purpose flour
1/4 tsp baking powder
1/2 tsp salt
1/2 tsp vanilla extract
2 tbsp milk
Filling
1 1/2 cups creamy peanut butter
3/4 cup confectioners’ (powdered) sugar
pinch salt
1/2 tsp vanilla extract
12-oz semisweet chocolate
Preparation:
1. Preheat oven to 350F. In a large mixing bowl, cream together butter and sugar. Add in flour, baking powder and salt at a low speed, then add in vanilla and milk. The dough should come together into a soft ball of dough.
2. Take a tablespoon full of dough, roll it into a ball and then slightly flatten it into a disc about 1/4-inch thick. Place on a baking tray and repeat with remaining dough. NOTE: Cookies do not spread so you can fit quite a few on the tray.
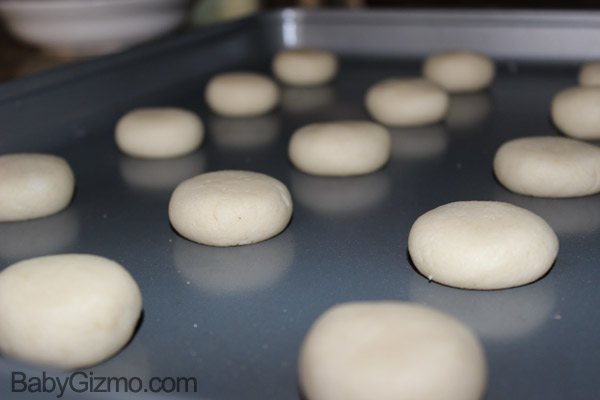
3. Bake cookies for 11-13 minutes, until bottoms and the edges are lightly browned and cookies are set. Immediately after removing cookies from the oven, use your thumb or a small spoon to make a depression in the center of each cookie. You have to do this immediately or the cookies will cool and when you try to press into them, the cookies will crack at the edges. That is bad! I even waited too long and couldn’t get the depression deep enough to add as much peanut butter filling as I would like!
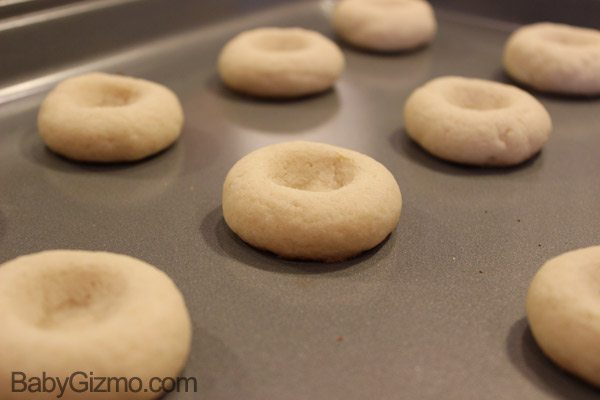
4. Let cookies cool for a few minutes on the baking sheet then transfer to a wire rack to cool completely.
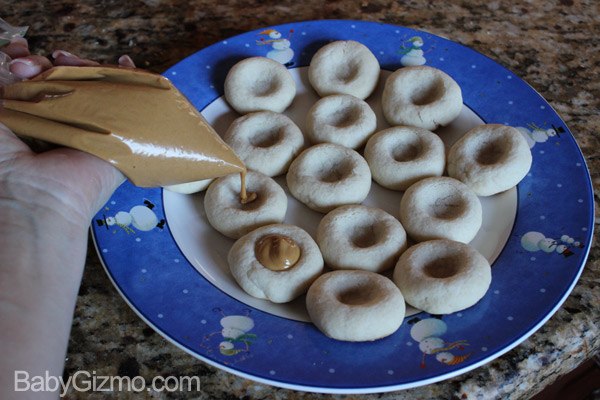
5. Time to make the peanut butter filling. In a small bowl, whisk together peanut butter, powdered (confectioners) sugar, salt and vanilla. When the mixture is blended, heat it in the microwave for about 30 seconds (watching it closely) until it is very, very soft – almost liquid-y. Transfer the hot liquid (be careful!) it to a pastry bag (or plastic bag with the tip cut off – this is what I did!) and squeeze a generous dome of the filling into each cookie’s “thumbprint”.
6. Put the cookies in the refrigerator and chill cookies with filling for 20-30 minutes, or until the peanut butter is firm.

7. Melt the chocolate either in the microwave on on a double boiler. Once melted, if you place the chocolate in a pan above another pan of hot, but not boiling water (aka double boiler-type situation!) to keep it fluid while you work, it’s much easier to work with.
8. Remove the chilled cookies from the fridge and dip one at a time into chocolate, let excess drip off, and place on a sheet of parchment paper to let the cookies set. I placed the cookies directly on a cooling rack over waxed paper to let the chocolate drip off a bit and it worked out great but it did leave lines on the bottom of the cookies. You can also chill the cookies again to accelerate the process.
9. Once the cookies are set- you can enjoy the deliciousness that is Homemade Tagalong Cookies! NOTE: Next time I plan to make a deeper impression in the shortbread cookie and add more peanut butter filling. Makes 3 dozen cookies.
Recipe Adapted from: Baking Bites

Girl Scout Tagalong Cookie Recipe
Ingredients
- 1 cup butter soften
- 1/2 cup sugar
- 2 cups all purpose flour
- 1/4 tsp baking powder
- 1/2 tsp salt
- 1/2 tsp vanilla extract
- 2 tbsp milk
- 1 1/2 cups creamy peanut butter
- 3/4 cup confectioners’ powdered sugar
- pinch salt
- 1/2 tsp vanilla extract
- 12- oz semisweet chocolate
Instructions
- Preheat oven to 350F. In a large mixing bowl, cream together butter and sugar. Add in flour, baking powder and salt at a low speed, then add in vanilla and milk. The dough should come together into a soft ball of dough.
- Take a tablespoon full of dough, roll it into a ball and then slightly flatten it into a disc about 1/4-inch thick. Place on a baking tray and repeat with remaining dough. NOTE: Cookies do not spread so you can fit quite a few on the tray.
- Bake cookies for 11-13 minutes, until bottoms and the edges are lightly browned and cookies are set. Immediately after removing cookies from the oven, use your thumb or a small spoon to make a depression in the center of each cookie. You have to do this immediately or the cookies will cool and when you try to press into them, the cookies will crack at the edges. That is bad! I even waited too long and couldn’t get the depression deep enough to add as much peanut butter filling as I would like!
- Let cookies cool for a few minutes on the baking sheet then transfer to a wire rack to cool completely.
- Time to make the peanut butter filling. In a small bowl, whisk together peanut butter, powdered (confectioners) sugar, salt and vanilla. When the mixture is blended, heat it in the microwave for about 30 seconds (watching it closely) until it is very, very soft – almost liquid-y. Transfer the hot liquid (be careful!) it to a pastry bag (or plastic bag with the tip cut off – this is what I did!) and squeeze a generous dome of the filling into each cookie’s “thumbprint”.
- Put the cookies in the refrigerator and chill cookies with filling for 20-30 minutes, or until the peanut butter is firm.
- Melt the chocolate either in the microwave on on a double boiler. Once melted, if you place the chocolate in a pan above another pan of hot, but not boiling water (aka double boiler-type situation!) to keep it fluid while you work, it’s much easier to work with.
- Remove the chilled cookies from the fridge and dip one at a time into chocolate, let excess drip off, and place on a sheet of parchment paper to let the cookies set. I placed the cookies directly on a cooling rack over waxed paper to let the chocolate drip off a bit and it worked out great but it did leave lines on the bottom of the cookies. You can also chill the cookies again to accelerate the process.
- Once the cookies are set- you can enjoy the deliciousness that is Homemade Tagalong Cookies! NOTE: Next time I plan to make a deeper impression in the shortbread cookie and add more peanut butter filling. Makes 3 dozen cookies.












just curious, but why not put the thumb impression in first before you bake them (especially since these don’t spread) wouldn’t that be easier? (And even give a kid something to do…)
I just tried doing it this way and they spread enough to mostly flatten out. I tried to salvage them, but it’s not quite right. I’d suggest giving her way a try:)